Category: Shopping
Great Brownings Master Bedroom
Updated 2 June 2019
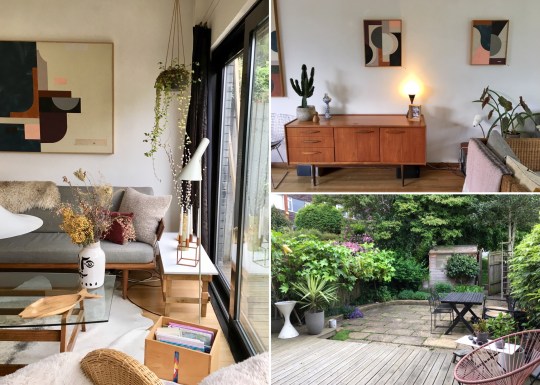
I’ve somehow resisted the temptation to fill the master bedroom with clutter, just adding this Flensted mobile (“Turning Leaves”) to the corner of the room as a finishing touch.

I also picked up this rather natty duvet set for £20 from the new Överallt range at Ikea, a series of items covered in a colourful abstract print of people and animals.

The en-suite bathroom remains a crusty pink mess.
Updated 18 February 2019
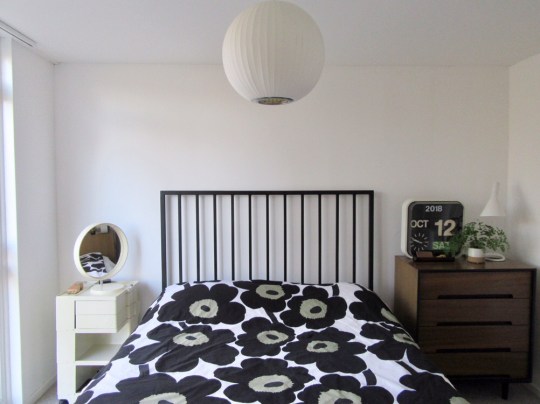
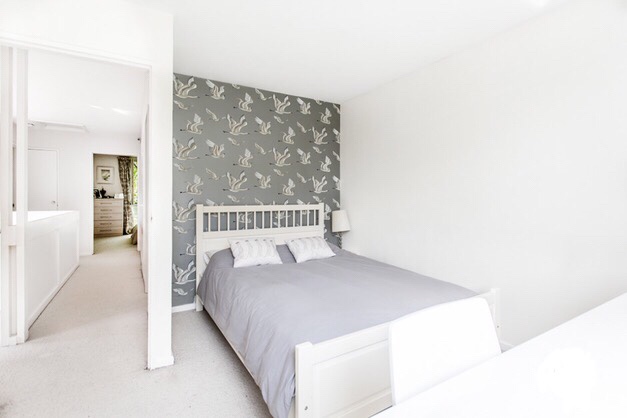
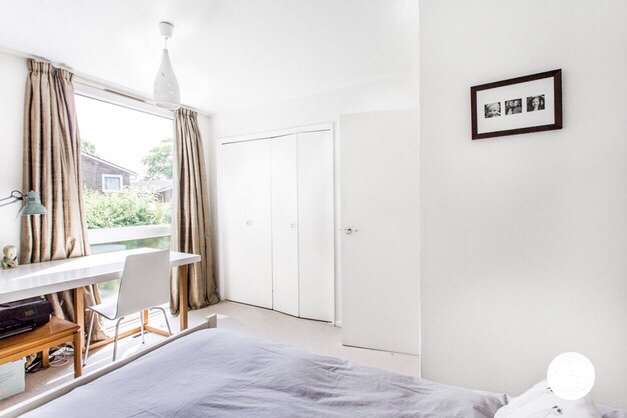
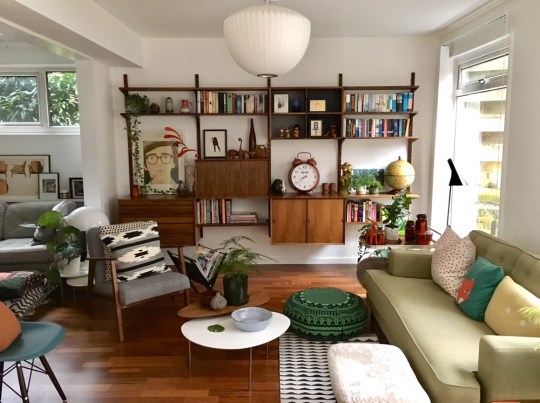
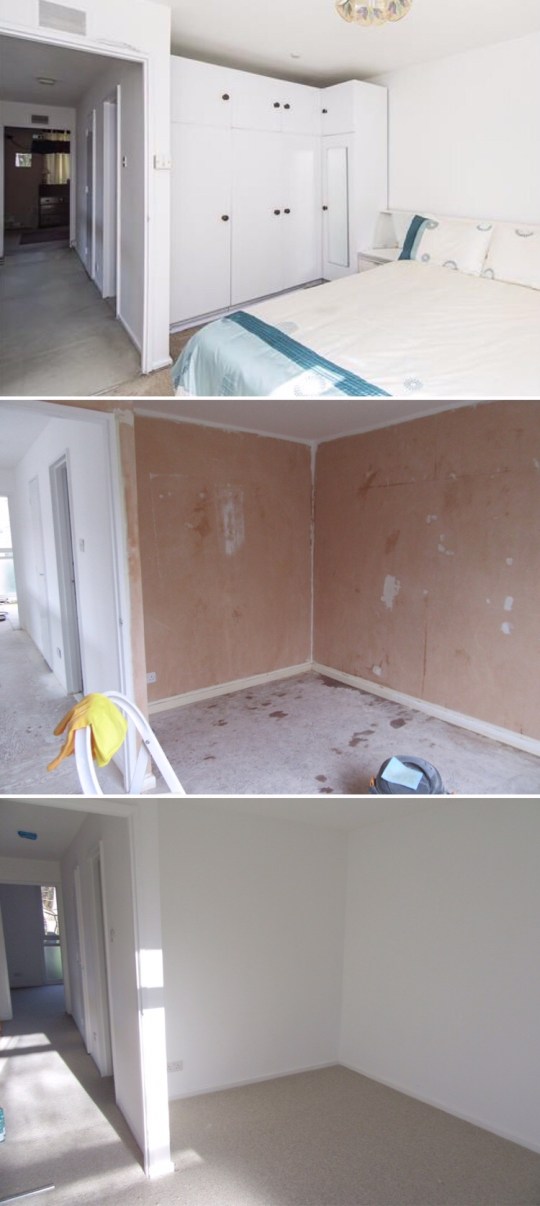
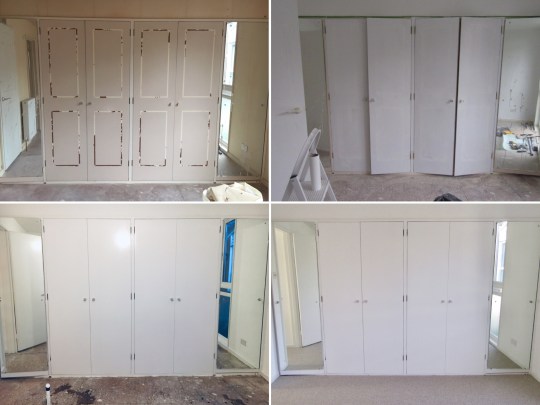
One of the more difficult rooms to redecorate (thanks to the wall-to-wall built-in wardrobes which needed a lot of attention inside and out) and furnish (due to the fact that there’s only one wall to put furniture against), I’m quite pleased with how the master bedroom has turned out – it’s basically a blend of the three bedrooms pictured below that I stole inspiration from.

The best thing about this room is its outlook onto Great Brownings though I think most of this view will be obscured when the trees start to sprout leaves again.

The door to the en-suite bathroom is closed in these photos because it remains a hot mess.
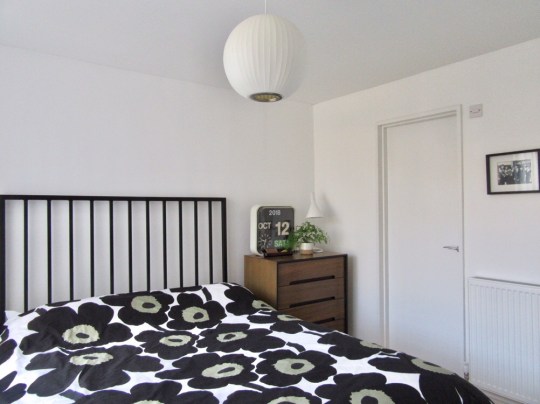
Although it looks alright, the room doesn’t feel quite finished yet. I’d like to hang more artwork – (potentially something above the Boby trolley on the left of the bed?) and source some kind of rug to go in front of the bed (a bit like this). Further update to come when I’ve filled the room with a bit more clutter.
12 November 2018
The master bedroom is at the front of the house with a wall of built-in wardrobes, dusty rose wallpaper and an equally pink en-suite bathroom, which will warrant its own blog entry when we turn our attention to it.


Rather than come up with any original design ideas of our own, we will be aping other rooms we’ve seen in other houses or online again.
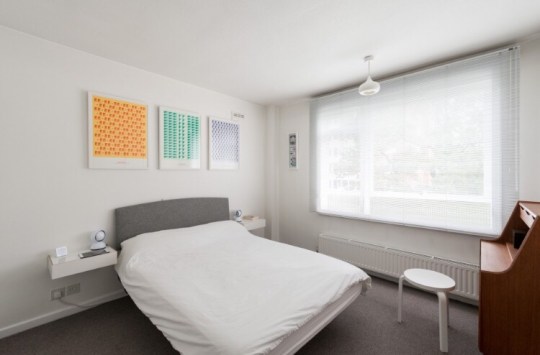
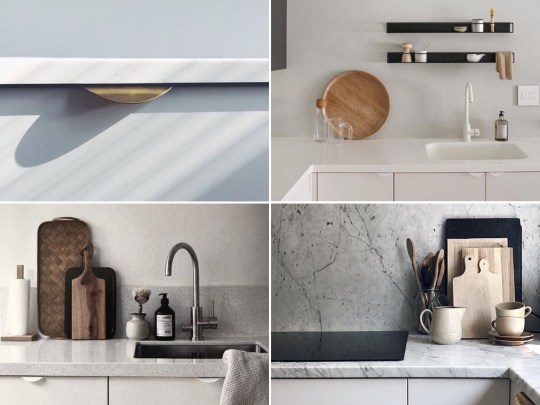
The first bedroom that sprang to mind as something we could copy was from a flat in Grenville Court that I narrowly missed out on buying a couple of years ago: it had white walls, textured grey carpet and was simply furnished in a similar style to my existing flat. It was simple, calming and achievable with the resources we have available.


Another potential source of inspiration was the bedroom in one of those Norman Starrett houses featured in Mid Century Magazine. This bedroom was a bit more high-end, furnished entirely with mid century rosewood pieces with a fine, short tufted, almost velvet-like grey carpet. I managed to find a synthetic carpet with a similar look and feel (something called Smart Vienna) but I wasn’t sure how it would look with our non-antique, slightly more modern furniture.


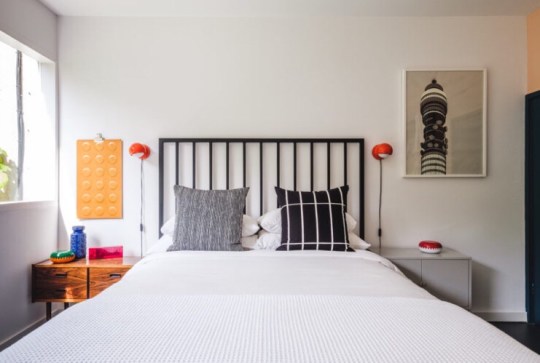
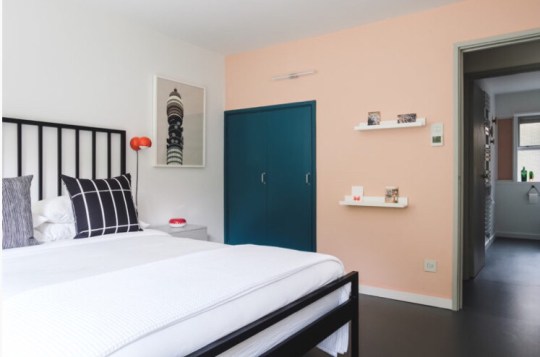
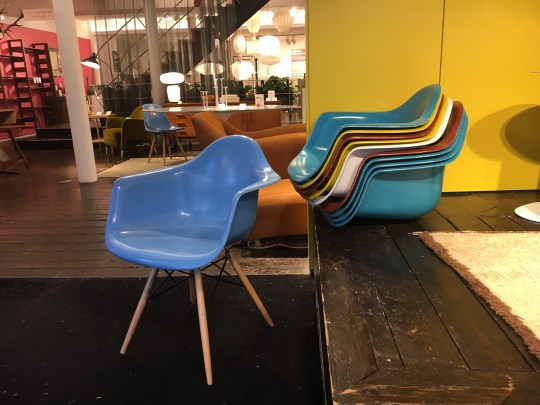
The final bedroom I thought we should copy was from a recently restored flat on the Parkleys estate in Ham. A more playful take on mid-century modern, I liked the use of colour against the grey rubber floor. I also loved the bed so much that I immediately did an online trawl of furniture shops and happily found it on Habitat for about £300 in the sale.

Entry to be updated once master bedroom starts taking shape.

1. Stag mid century chest of drawers recycled from my current flat
2. Fake Tablo three-legged table recycled from my current flat
3. Slightly broken Habitat Flap clock recycled from my current flat
4. Yellow Boby Trolley recycled from my current flat
5. Lucia bedframe from Habitat
6. Textured Kersaint Cobb carpet in Morning Frost – we’re carpeting the whole of the upper floor in this as I couldn’t risk the velvety Smart Vienna looking weird
7. Marimekko bedding recycled from my current flat
8. Fake George Nelson bubble lamp recycled from my current flat
9. Poster Ladder by Marie-Aurore Stiker-Metral recycled from my current flat
Dulwich Artists Open House
The Dulwich artists’ Open House weekend allowed me to enjoy two of my favourite pastimes at once: shopping and nosing around other people’s mid century homes.

(from L-R, starting with top row) works by: Charlene Mullen, Sarah Hamilton, Emily Jo Gibbs, Jo Lewis, Fabio Almeida, Victoria Kitchingman, The Fine Groove, Jim Grundy and Birgitta Pohl
With the goal of finding a suitable artwork to hang on one of the bare walls in the hallway of our house, we set off around the map provided by the organisers. I’ll admit that I chose the places that we ended up visiting 40% based on the art (which I won’t even attempt to write about due to a lack of knowledge and appropriate vocabulary on my part – I’ll provide links to the artists’ websites instead) and 60% based on the house in which the art was being exhibited.
First on the agenda was Sarah Hamilton who was displaying her prints, painting and homewares in her Austin Vernon & Partners-designed house in Peckarmans Wood.

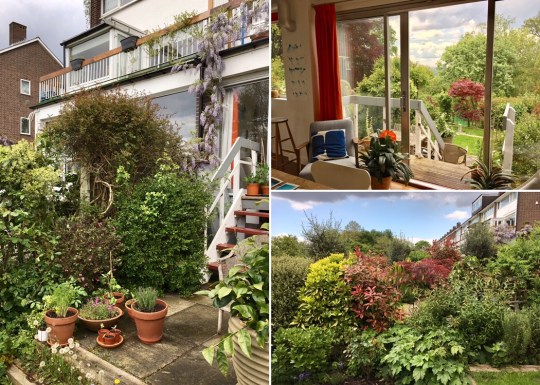
Peckarmans Wood – exterior and grounds
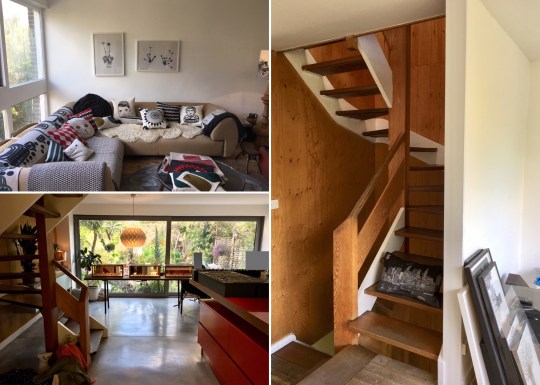
Built in 1963 and widely considered to be the finest of all the 1960s Dulwich houses, her house was one of the larger, two storey types with an upside-down layout (entry and living spaces on the ground floor, bedrooms on the lower lground floor with access to the garden), floor-to-ceiling windows, wooden panelling, pitched ceilings and elevated views over the communal grounds and towards the City.

Peckarmans Wood, interior (Sarah Hamilton)
Just further up the road were Victoria Kitchingman who was displaying her portrait-focussed oil and mixed media paintings and paintings, and Jo Lewis who was displaying her water-based paintings, in Woodsyre, another Austin Vernon & Partners-designed terrace of houses.

Woodsyre, interior (Victoria Kitchingman)
These houses were deceptively substantial, containing multiple, generously proportioned living areas (both artists had knocked through the original kitchen on the ground floor) and five bedrooms spread across four floors.

Woodsyre, interior (Jo Lewis)
Both houses had panoramic views from the top of Sydenham Hill and access to an idyllic communal green at the bottom of the their beautifully manicured gardens.
Woodsyre, garden (Jo Lewis)
Next on the list were The Fine Groove and Birgitta Pohl exhibiting intricate wood engravings and functional, decorative stoneware at a split-level maisonette which had the feeling of a house in Breakspeare, a sixties-looking development next to Sydenham Hill station.

Breakspeare (The Fine Groove and Birgitta Pohl)
Joy Godden and Charlie Loxley were exhibiting jewellery and children’s prints in a house in Lings Coppice, which had been reconfigured on the ground floor to create an open plan space with bi-folding doors opening out onto the garden.

Ling’s Coppice, interior (Joy Godden and Charlie Loxley)
Jim Grundy was exhibiting his rather stunning geometric abstract paintings at his classic sixties three-storey townhouse on Half Moon Lane.

Half Moon Lane (Jim Grundy)
Slightly further afield near Denmark Hill was Charlene Mullen displaying her embroidered scenic cushions and ceramics of London at her house in The Hamlet, a rather lovely development of 32 terraced houses arranged in a rectangular formation around a large communal green.

The Hamlet, exterior (Charlene Mullen)
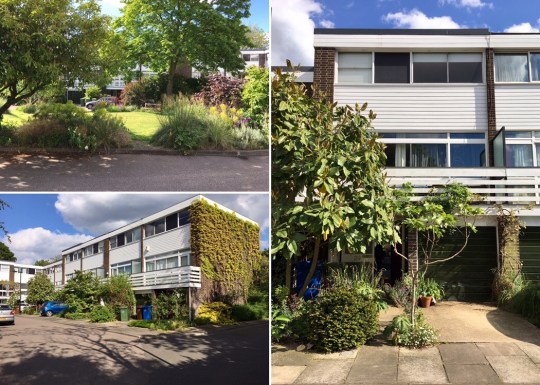
The Hamlet, exterior (Charlene Mullen)
Built in 1967, it was reportedly architect Peter Moiret’s final project before he died so he was intent on designing something special. Split over three floors, the house was generously proportioned with an open-plan, very deluxe-looking kitchen on the ground floor with access to an exotic-looking garden and a split-level reception room on the first floor with a balcony at both ends.
The Hamlet, interior (Charlene Mullen)
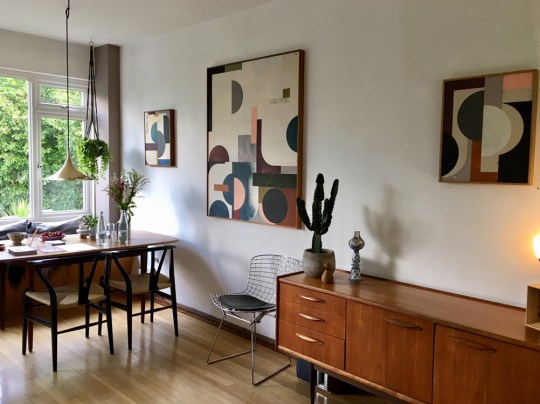
Last on the itinerary were Emily Jo Gibbs and Fabio Almeida in Forest Hill. Emily Jo Gibbs was displaying her beautifully delicate hand-stitched textile portraits and still lifes in the classic three-storey sixties townhouse opposite the Horniman Museum that she grew up in.

Tarleton Gardens, interior (Emily Jo Gibbs)
Fabio Almeida’s abstract paintings and collages persuaded us to trek up that hill to the Grassmount development.
Grassmount, interior (Fabio Almeida)
Like the townhouse in Grassmount that we viewed during our property search, Fabio Almeida’s house was generously proportioned and provided the perfect mid-century flavoured backdrop for his fantastic (and surprisingly accessibly priced) pieces.
Grassmount, interior (Fabio Almeida)

Grassmount, interior (Fabio Almeida)
Great Brownings kitchen
Updated 25 March 2019
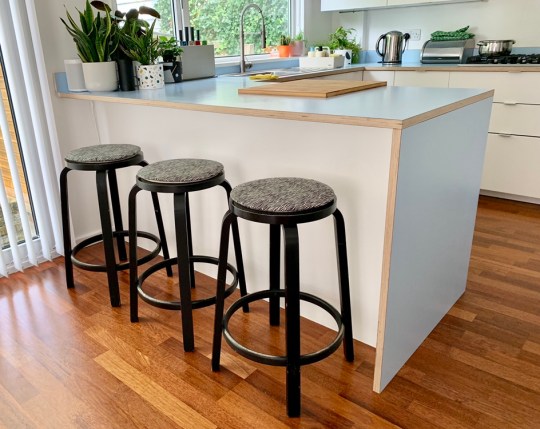
As much as I’ve always liked these Artek zebra print seat pads, I couldn’t justify buying three of them for the stools in the kitchen at £80 each (more than we paid for the stools themselves).
 My cheapskate solution was to construct our own knockoffs using cheap seat pads, fabric from eBay and a local tailor.

Whilst no one is going to be mistaking my efforts for the real thing, I don’t think the overall effect is too bad? The zebra print pattern is obviously a lot smaller than on the genuine article (which wasn’t apparent from the fabric thumbnail when I bought it online) but the tailor has done a pretty neat job and they did work out as being a fraction of the price. Perhaps most importantly, the stools are reasonably comfortable to sit on now.

Updated 10 February 2019

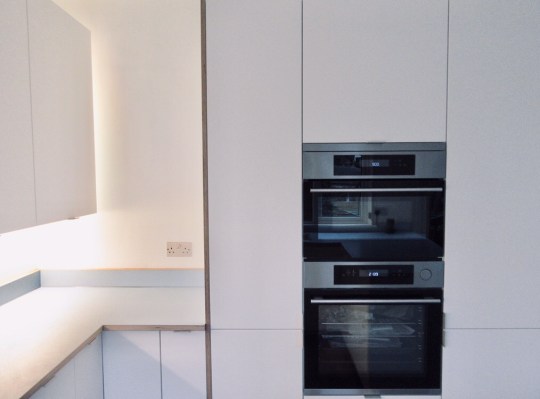
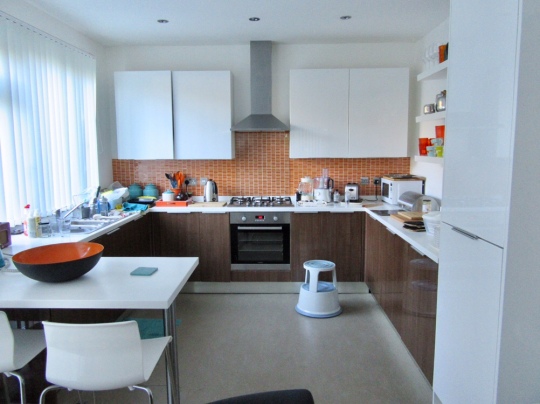
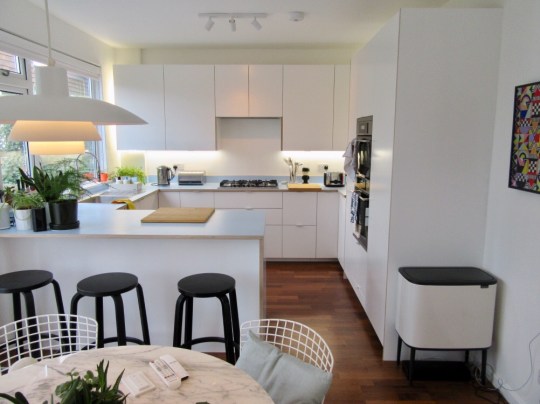
Our finished kitchen is pretty much what we planned save for the colour of the Formica worktop (rather than that mustard colour, we went for an iris blue that we directly copied from those images of that kitchen in the Bromley house – scroll down to see pictures of a near identical kitchen), the cupboard door handles (we decided that the holy wafer ones from Superfront were a bit twee and expensive and so bought some cheap and discreet rectangular plates) and the absence of tiles on the back wall (we decided that tiling plus the upstand would be a bit much but we’re now terrified of anything splashing onto the painted white walls, which makes cooking food on the hob a weirdly tense experience).


The bar stools are some very worn Artek Stool 64s (the 65cm version), which we found on eBay for £200 for the three. There are plenty more where they came from as the seller seems to have loads which he apparently sourced from Apple stores.
After having been asked a few times, I can confirm that the rectangular box on legs is a bin.
I can also report that having used it now for a few weeks, the Kulinarisk steam oven from Ikea was not worth the additional expense. It might just be the fact that it’s a relatively low-end model (some friends of ours have a Gaggenau model which cost more than our entire kitchen) but the steam doesn’t seem to make any discernible difference to the food and we hadn’t quite appreciated that the water would need to be drained after each time the oven is used using a little plastic hose which spurts water all over the floor.
On the whole, however, we’re really happy with how the kitchen has turned out looks-wise and from a practical use perspective. If we were to do it all again, I probably would have tried to avoid fitting the wall cabinets to the back wall (I’m still envious of our neighbour’s with its “no wall cabinets” aesthetic – scroll down to see photos) but that’s about it.


5 November 2018
I thought I’d start by writing about our attempt at designing our new kitchen given that it’s probably going to be the largest and most expensive part of our renovation project.
As I mentioned in my previous blog entry, the Great Brownings houses have a separate kitchen and dining room with a very 1960s-style serving hatch (a rare example of a mid-century design feature that hasn’t ever come back into fashion) connecting the two. Our house features this original setup but it looks like the original kitchen was refitted at some point in the 1980s judging by the country cottage-style cabinets and tiles.


Based on what we’ve seen online and our neighbours’ houses, most people who have renovated their house on the estate have chosen to knock down the dividing wall to make an open-plan kitchen/diner, with some kind of breakfast bar in the middle. This made perfect sense to us so we decided to follow suit.
Given our lack of experience of selecting and designing a kitchen (we’ve always lived in places where we’ve had to accept whatever kitchen we’ve been given) and general lack of imagination, we were keen to find another kitchen to copy almost directly.
If we had the funds and creativity, we’d have loved to have gone for something like our neighbour’s bespoke timber kitchen with its mixture of dark wood and reclaimed industrial metal worktops.
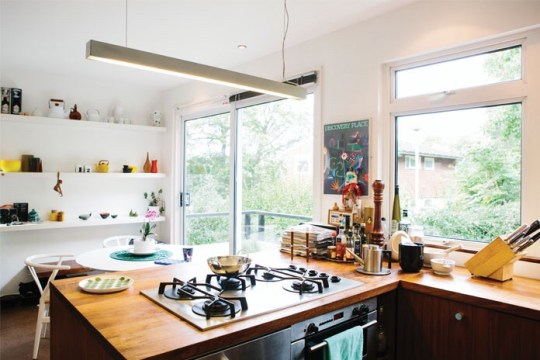
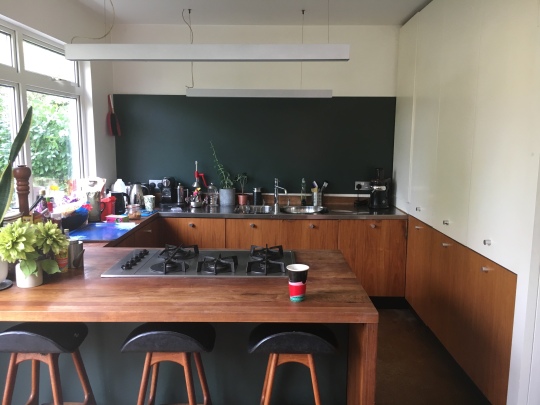

We really liked the fact there were no cabinets across the back wall with all of the storage confined to the floor-to-ceiling tall units along the right-hand wall (the “no wall cabinets” look seems to be a thing these days – they never seem to feature in any kitchens in magazines or Instagram) but given we’d had the boiler fitted on the back wall and couldn’t envisage not having some kind of extractor fan, it didn’t feel like an option open to us.
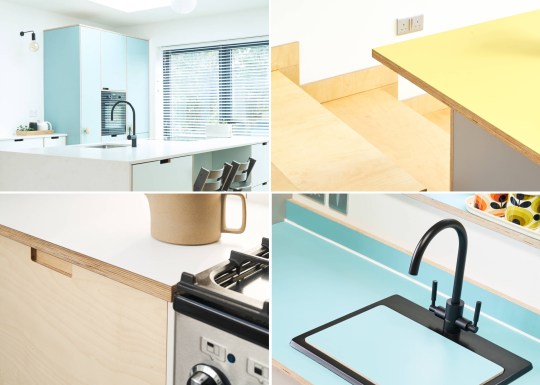
The layout of this kitchen from a mid-century house in Bromley with wall cabinets across the back wall, plywood cabinets and Formica worktops seemed like more of an achievable/practical goal for us:


As such, we pretty much copied it in its entirety when sketching out our plan, only adding a breakfast bar section as per our neighbour’s.
Rather than commissioning somewhere like Uncommon Projects to build a whole bespoke plywood kitchen from scratch for us, our original plan was to buy the carcasses and appliances from IKEA and the door fronts, side panels and worktops from a company called Plykea, which specialises in helping people who want to look like they’ve invested in a bespoke plywood kitchen when they haven’t.

However, we discovered that we couldn’t justify the cost of doing this (it turns out that faking a bespoke plywood kitchen is still a pretty expensive undertaking) so we decided to only order the Formica worktops and side panels from Plykea and bog standard white door fronts from IKEA (possibly livened up with some “Holy Wafer” door handles from Superfront, which cost about the same price as the actual door per unit) with a view to replacing them next year with something a bit more special.
Having used the IKEA kitchen planning tool (which we found to be very detailed but completely unintuitive, akin to a fiddly version of the house building tool on The Sims) to map out and order the kitchen components, we sent the plan and instructions to Plykea for them to build the worktops and side panels.


We’ve still not quite decided what colour would look right for the Formica worktops – I was initially dead set on mindlessly recreating the Bromley kitchen (which would have meant having a sky blue worktop) but we figured that might not look quite right if we end up replacing the white door fronts with timber ones next year. In light of this, we’re gravitating towards something in the mustard/taupe region.
For the floors, we’re planning to just lay the same kind of engineered Merbau wood flooring that we’re using throughout the ground floor rooms and for the walls, white paint and some square white tiles for the back wall (mindlessly aping the Bromley kitchen).
Furnishings and lighting for the dining area (including my slightly too low Saarinen marble tulip table) will be recycled from our existing homes.
Entry to be updated once the kitchen starts taking shape!

1. Formica worktop from Plykea, possibly in this colour or maybe something a bit more muted?
2. Holy wafer cupboard handles from Superfront though having put this mood board together, I think the silver might look a little twee – perhaps the practically invisible white version would look better?
3. Square white tile with dark grouting for the back wall – I’m tired of subway tile having lived with it for five years but I still like a bit of dark grout.
4. Vimmern tap from Ikea – not exactly the best looking tap of all time but I’ve always wanted one with an extendable hose.
5. Poul Hennignsen pendant lamp to hang over the dining table – recycled from my current flat
6. Bertoia wire dining chairs – recycled from my current flat. Having lived with them for about a year, I have conceded that they’re really not that comfortable but I won’t ever get rid of them or repurpose them as garden furniture because of the amount of work I put into them.
7. Engineered Merbau flooring from The Natural Wood Co. The original plan was to have real parquet blocks throughout apart from the kitchen area, where I really wanted cork. This plan was abandoned when we discovered how difficult and expensive it is to lay a parquet floor (about three times the price of the actual parquet blocks) and how nervous builders seemed to be about cork. I’ve come round to the idea of having an uninterrupted expanse of resilient, treated wooden flooring throughout the ground floor of the house.
8. Kulinarisk steam microwave and oven – I have no idea whether the steam oven functionality will actually make our food moist on the inside and crispy on the outside but we were obviously sufficiently convinced by the marketing materials to find out.
9. Saarinen marble tulip table – recycled from my current flat
10. Alvar Aalto rocket stools – there are currently a load of these on ebay for only £60 each, which given our increasingly bloated budget, is reason enough to go for them.
11. Eldslaga 5-ring hob – these were all over the press last year because they needed to be recalled due to emitting unacceptable amounts of carbon monoxide. I’m hoping the reissued version is a bit safer.
12. String shelving – recycled from the bedroom in my current flat.
Great Brownings second bedroom
Updated 10 March 2019

Some evidence of our slightly dodgy DIY paint job on the walls and skirting boards aside, the second double bedroom looks pretty much how we’d planned for it look.


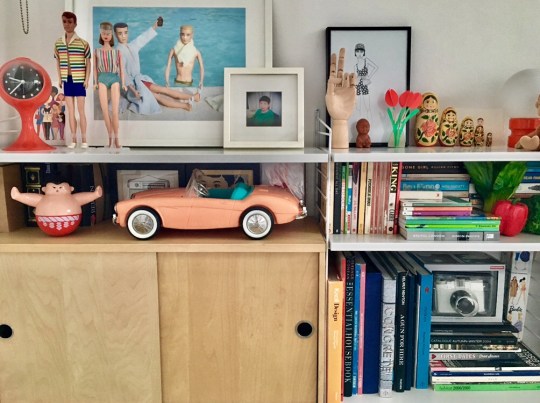
I finally got to make use of that string shelf/desk unit languishing in the cupboard (which now looks like a shrine to nerdishness) and that CB2 laundry basket that I dragged back with me from New York has pride of place in the corner.


I’m quite pleased with the Eames DSW chair: we managed to improve it by replacing the cheap plastic shell with a much nicer fibreglass Modernica shell from the SCP sale (I’d recommend looking out for these as our one was a bargain). The only thing that gives away the base of the chair as a fake now are the silver bolts – maybe a black Sharpie will do the trick?
Modernica fibreglass shell from SCP attached onto a fake DSW base
30 December 2018
This is the other double bedroom. It’s a decent size but previously contained an enormous freestanding wardrobe and chest of drawers which took up most of the space.


We decided to copy the layout in these photos of the same room in another house on the estate, ripping out the freestanding wardrobe in order to put the bed in its place.
I was also determined to make use of that full length String wall panel that I bought from a sample sale in 2014 but never had any room for so we’ll be installing a desk unit on the wall next to the window.


The room is currently in a stripped back, replastered state with the new radiator installed unobtrusively behind the door. It just needs to be painted in (yet more) white paint, carpeted and then we can start moving in the furniture.
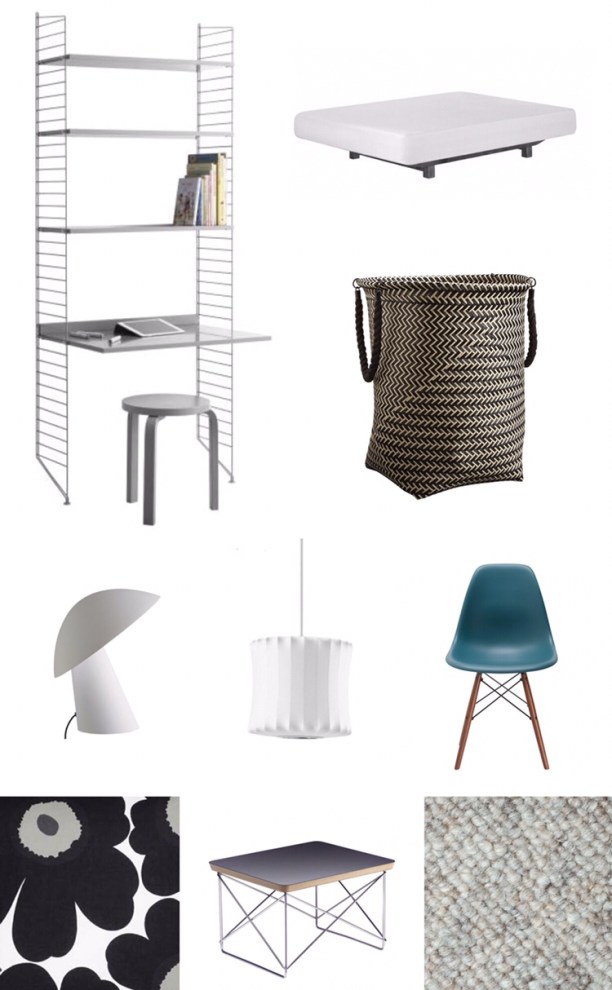
1. String work desk unit
2. Studio bed frame from now defunct bed retailer Warren Evans recycled from my current flat
3. CB2 Parkay laundry basket that I somehow managed to carry back with me from New York
4. Porcini Lamp from Habitat recycled from my partner’s current flat
5. Modernica George Nelson bubble lamp recycled from my current flat
6. Fake Eames DSW chair recycled from my current flat
7. Marimekko patterned bedding recycled from my current flat
8. Fake Eames occasional table (to be used as a bedside table) recycled from my partner’s current flat
9. Textured Kersaint Cobb carpet in Morning Frost
Great Brownings bathrooms
Updated 25 February 2019
The only bathroom worthy of an update is the downstairs WC.

Having laid some cheap poured rubber effect vinyl flooring, fitted a new Ostana ceiling light from Ikea and cluttered the ledge behind the loo with a bit of decorative tat, I don’t think it’s looking too bad.

The ceiling is nice and high and the walls, which have a hexagon tile-effect pattern, actually look semi-good. The 00s aqua blue glass basin, however, does not. It would be nice to replace it with something like the Pozzi Ginori 500 model featured in this blog post on Modernist Estates.
As I have mentioned previously, we haven’t done anything to the master bathroom, which remains a bit tired-looking and the pink ensuite bathroom, despite our best efforts to spruce it up a bit, still looks a hot mess. I’ll do an update on these two bathrooms in about six months when we’ve replenished our house renovation fund and start works on them.
25 December 2018
The house has a WC on the ground floor and two bathrooms on the first floor (one main bathroom and one ensuite).


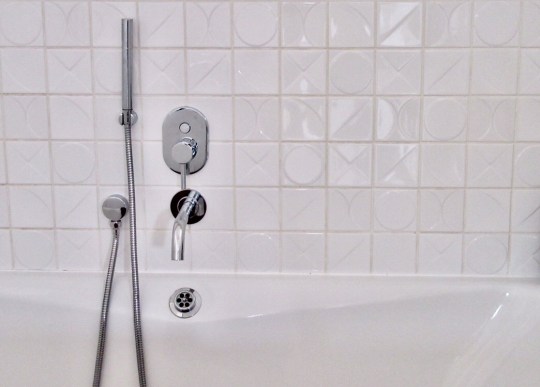
Given our bloated budget and the fact that none of these rooms are out-and-out offensive (though I don’t think I’ve ever seen anything more early 00s than that aqua blue glass bowl sink in the WC), we’ve decided to wait until sometime next year to renovate them, using these relatively unambitious photos as inspiration:
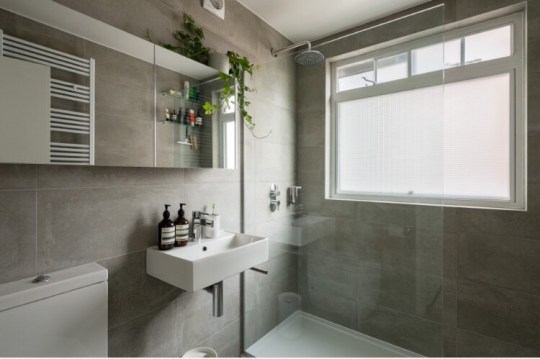


We’ll also be swapping round the shower unit (currently in the main bathroom) and the bathtub (currently in the ensuite) and if we can find someone to do it, we’d quite like to copy this hotel-style built-in vanity unit that we saw in our neighbour’s ensuite. We also rather liked her double-ended bathtub.

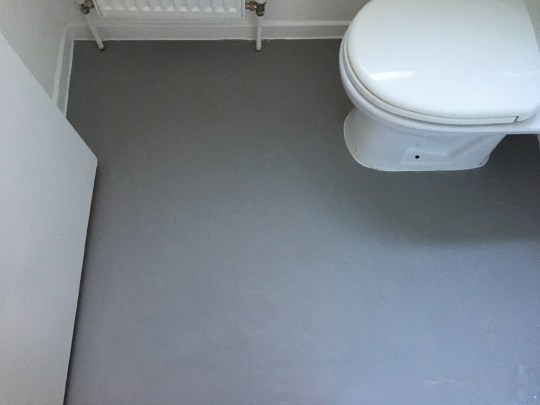
In the meantime, however, that the ensuite could do with a bit of a quick facelift to make it a bit less pink and floral. Here it is in its current state:
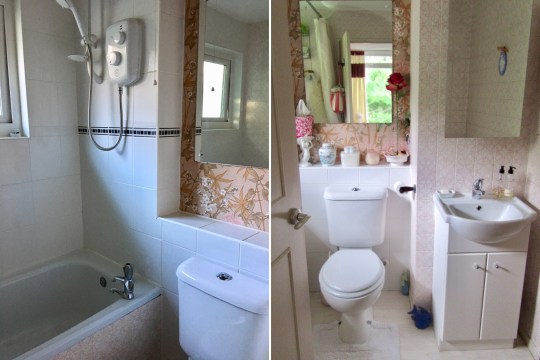
We’ll be replacing the wood effect laminate floor with some grey vinyl that looks a bit like poured rubber (if you squint) and we’ll paint the pink, textured tiling and floral wallpaper panel with white tile paint (I have no idea how effective this will be). Together with some accessorising, it’ll hopefully look halfway decent for the time being.

1. Lunar bathroom accessories recycled from my current flat
2. Ikea Ostana ceiling lamp – I find dish-like bathroom ceiling lights a little uninspiring so I like how this one resembles half a pill
3. H&M shower curtain – I optimistically think that this looks a bit like this more expensive version from Ferm Living
4. Ikea Foremal hook – a bizarre piece of porcelain from that weird collection of objects that Ikea recently put out. I cannot find anywhere else to hang it so why not here?
5. West Elm whale print bathmat recycled from my current flat
6. Bush radio recycled from my current flat
7. Ikea Bagganas knobs – I’m not overly keen on the vanity unit but thought that these new knobs might improve it a bit
8. Grey vinyl flooring which will hopefully look a bit liked poured rubber
Great Brownings hallway and landing
Updated 13 February 2019

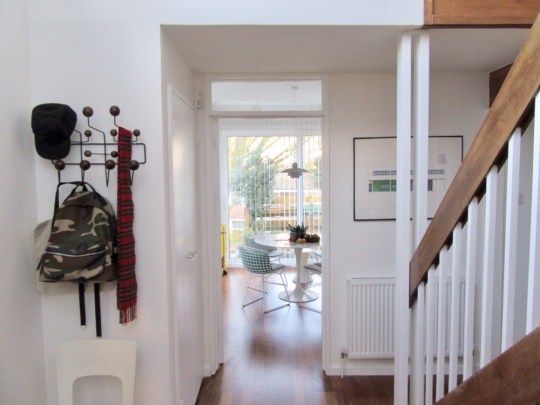
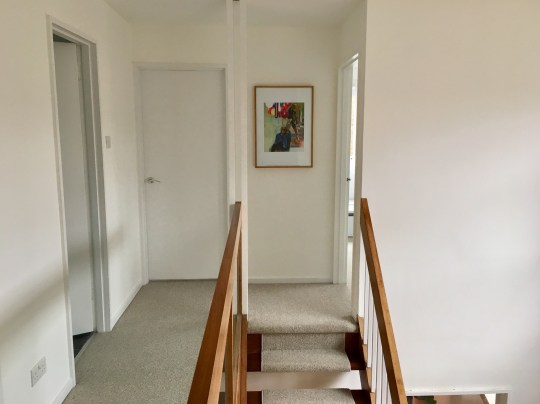
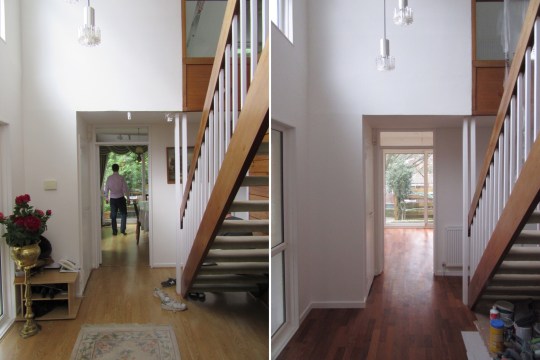
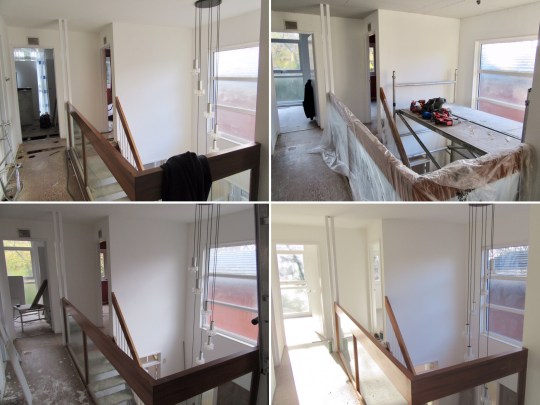
Based on the photos, I appreciate that the hallway and landing don’t look all that different from how they looked before (new wooden floor downstairs and new carpet upstairs aside) but the old photos didn’t quite capture all of the damage caused to the walls by the previous owner’s fixtures and fittings, messy wiring snaking around doorframes and of course, the wobbly cardboard ceilings. With all of these issues fixed, these parts of the house really do look a whole lot better in person than they did before.

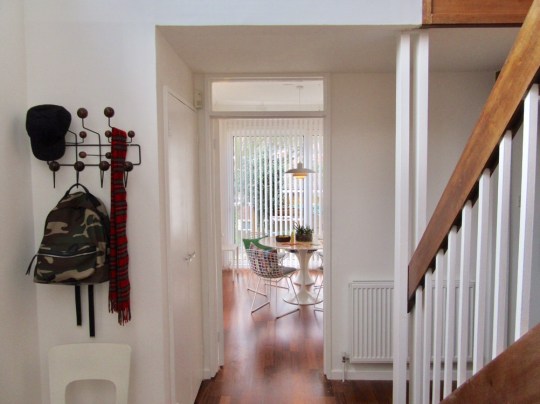
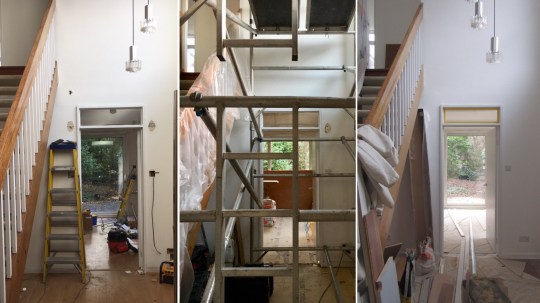
I’m glad that we insisted that the carpet fitters install our (admittedly very thick and unmalleable) carpet as a runner on the open tread staircase, exposing a strip of the wood on each side rather than agreeing to one of their lazier suggestions of carpeting the whole of each step (which is what was there before) or leaving them bare (slippery, lethal hazard).
We still haven’t quite decided what we’re going to do with the space under the stairs – at the moment, it’s just somewhere to put that Tom Dixon jack light. We’re also not sure whether to do anything about all of the wooden panelling and balustrades – it could do with some kind of treatment to restore it to its best.
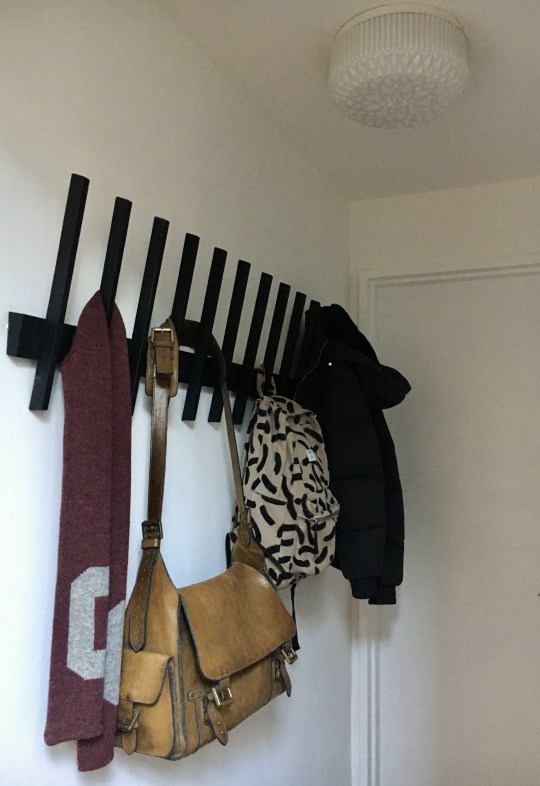
The tall-pronged coat hooks on the way to the loo are from SCP as my rather flimsy replica Hang-It-All definitely wasn’t going to be able to hang all of our bags and other crap.
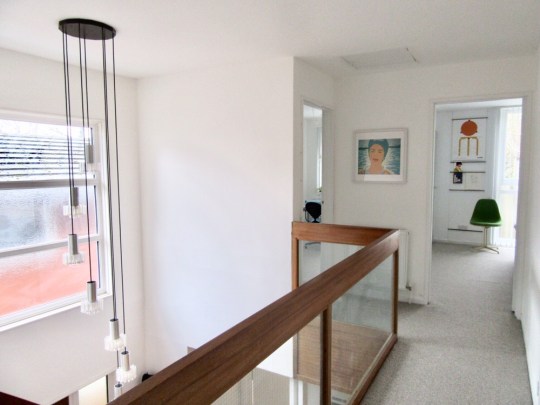
We still haven’t worked out how on earth we’re going to change the lightbulbs in the chandelier.
26 November 2018
One of the main selling points of the house for us was the main entrance and hallway – we really liked the double height space, long mid-century chandelier, open-tread staircase and the way in which all of the rooms upstairs and downstairs seem to branch off it in a logical way.

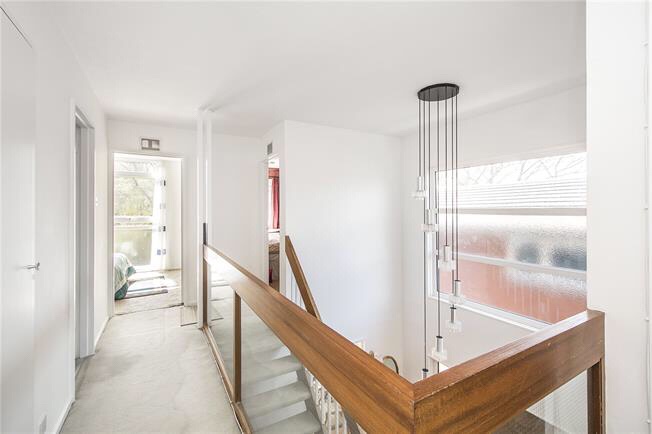
While we like the timber-clad wall, timber staircase and timber balustrade on the upper floor, it is a bit of a timber overload when you walk in, which will probably intensify when we lay the new wooden flooring, which is sort of the same colour as the stairs and the wall.

Some of our neighbours have painted the timber wall white, which does bring out the staircase and balustrade more and reduces the timber overload somewhat but we don’t think we will – it seems a bit sacrilegious to permanently paint over it, even if it is a bit 70s ski chalet/porno.

In terms of furniture, there’s a space under the stairs where the previous owner had her piano – we’re not sure what to do with this. We liked the idea of putting up a mirror on the wall behind the staircase like one of our neighbours to create an interesting reflection of the stairs and possibly some kind of sideboard, again like a lot of our neighbours have.

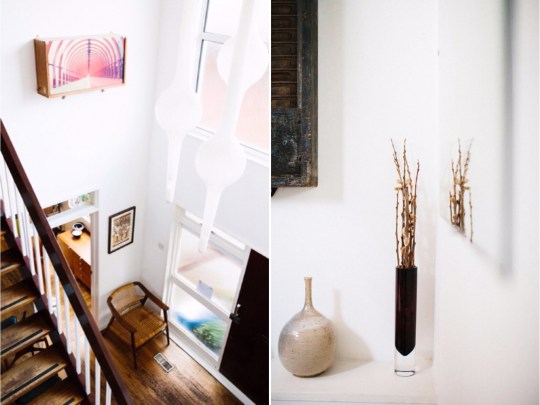


We’re currently in the midst of redecorating so there’s a big scaffold in the middle of ours – we made the unwelcome discovery that all of the ceilings upstairs were made of wobbly cardboard (apparently a thing in the 60s) and so had to reinforce it with plasterboard before plastering over it. A layer of white paint, wooden flooring downstairs and carpet upstairs and we should be done. I still haven’t worked out how we’re going to readily change the lightbulbs in the chandelier when they run out though.
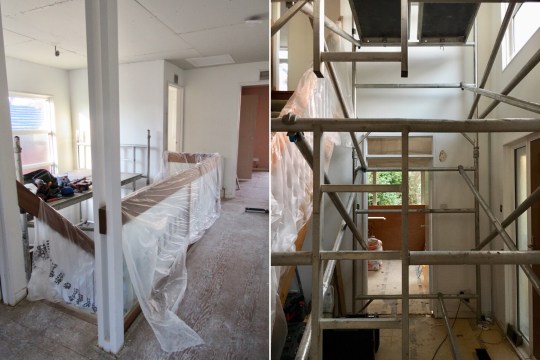

Entry to be updated once it starts looking decent.
This collection of objects looks rather on the bland side but I thought the overabundance of timber was probably enough of an assault on the eyes.
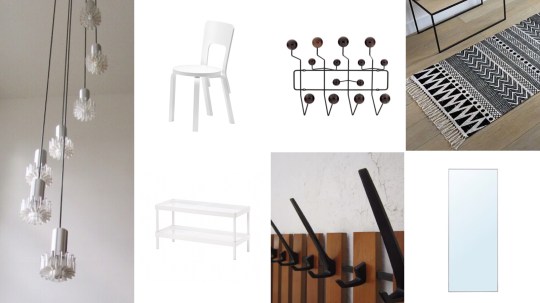
1. Mid century version of a chandelier – I’m pretty sure this is original from when the house was built because I’ve seen it in one of the other houses on the estate
2. Alvar Aalto 66 chair recycled from my current flat
3. Fake Eames Hang-It-All recycled from my current flat
4. Rug from LaRedoute recycled from my current flat
5. Mackapar shoe rack from IKEA – shoe racks are fundamentally ugly things but are preferable to shoes being strewn about the place. I think this one looks vaguely like something from Norman Copenhagen if you squint.
6. More coat hooks – these vintage teak ones are from eBay
7. Giant Hovet mirror from IKEA recycled from my current flat – this can go under the stairs (in an imitation of one of our neighbour’s flats)
Great Brownings study
Updated 12 February 2019

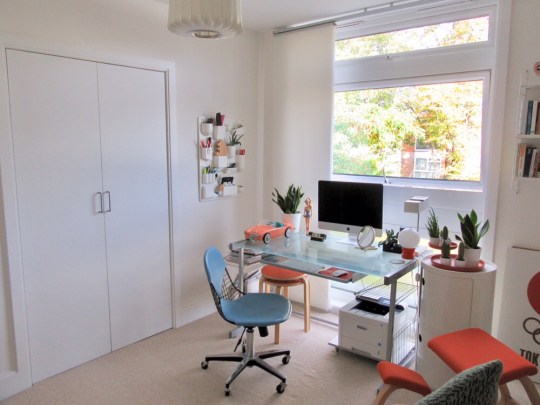
As planned, my study in the new house is a ported and condensed version of my old study (a lot of Marie Kondo-inspired getting rid of stuff that didn’t spark joy was necessary) with a new String unit and a Muuto e27 pendant lamp which I picked up in the Twentytwentyone sale. The frosted glass desk looks more early 00s than ever but the view from said desk out onto Great Brownings almost makes up for it.

10 December 2018
We plan to use this narrow single bedroom next to the master bedroom as a study.
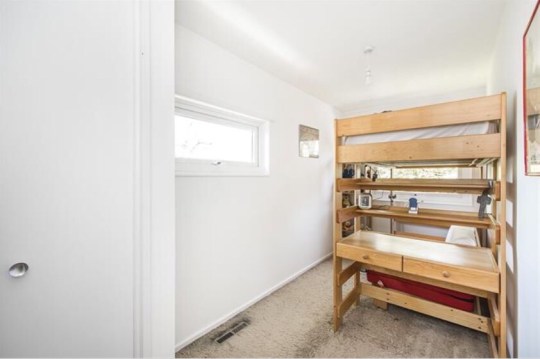
I plan to pretty much port and condense my existing study into this smaller space, save for some new bits of String shelving and storage that I picked up in the sales.

It’d also be nice to replace my old desk with something slightly less evocative of the early 00s when we can afford it – I like this Eierman desk, which is quite reasonably priced compared to all other higher-end desks I’ve looked at.

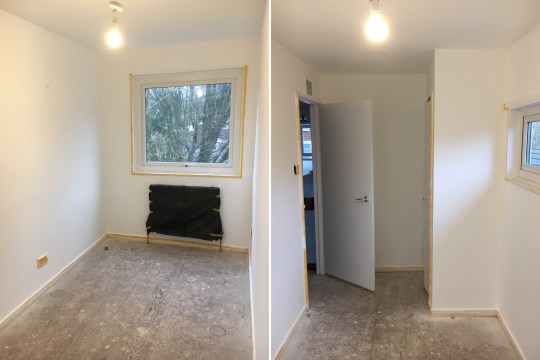
At this stage of our renovations, the walls and ceilings have been freshly replastered and painted so all we need to do now is to lay the carpet, fit the blinds (we’re going for those vertical blinds throughout – having seen them in our neighbours’ house, we decided to copy them even going as far to use the same company that our neighbours used) and we’ll be done.
Entry to be updated once it’s finished.

1. SCP pendant light bought from an SCP warehouse sale and never used (it’s a slightly less neutral shade of pink though)
2. String cabinets and shelves – again I picked up a heavily discounted sliding door unit from an SCP warehouse sale without having anywhere to put it in my current flat so I was determined to put it to use somewhere
3. Utensilo wall unit recycled from my current flat
4. Modernica rolling wire chair from SCP warehouse sale
5. Kartel Componibilli unit recycled from my current flat
6. Vintage desk lamp from a Berlin flea market recycled from my current flat that needs rewiring because it’s most probably a fire hazard in its current state.
Great Brownings renovation – lessons learned
After four months of daily calls and meetings with different contractors, missed deliveries, trips to Argos and Leyland for supplies and consecutive weekends spent sanding and painting walls, the renovation job on our house is finally finished.

While our project seemed to go more smoothly than this renovation of a Parkleys Span flat that I followed on another blog (though this could be due to the fact that theirs was a sensitive, faithful mid century restoration and ours was most definitely not), it wasn’t all smooth sailing. With the benefit of hindsight, I thought I would set out some (basic) things that I should have known at the start of the process.
1. It makes more sense to engage one contractor to do everything (or subcontract work if they don’t have the specialist expertise) than separate contractors who have to having to share the work space and who end up blaming one another for problems or mess. We didn’t appreciate this and ended up hiring a separate builder, plumber, electrician, blinds fitter, rubbish removal company and carpet fitter – this situation was less than ideal.
2. It’s important to get on with the builders as people because out of all of the contractors, you will be dealing with and seeing an awful lot of them. Thankfully, the builders that we used were great – they were transparent and communicative in relation to costs, competitively priced, paid attention to small details, seemed invested in our project, had a very “can do” attitude to everything (unlike another builder we saw who tutted, shook his head and generally couldn’t hide his dismay at everything he’d have to do to our hot mess of a house) and were generally nice people.

3. When builders provide an estimate for painting, it seems really expensive for a task that doesn’t really require any skill or expertise, especially when compared to some of the stuff that they do which definitely does require skill and expertise. As such, we decided to ask the builders to paint everything downstairs but leave the whole of the upstairs for us to paint in an attempt to save on costs. I’m not sure if I’d do this again – while we did save a fair bit of money and there was some satisfaction to be derived from doing a little of the work ourselves, it took us weeks and there is a marked difference in quality between the rooms that were professionally painted and the rooms that we attempted.
4. If you want smooth, matt walls but the existing walls are covered in layers of old wallpaper, the only way to achieve a flawless result is to painstakingly strip back the walls to the plaster, sand it down, fill in holes, repair damaged plaster, paint and then paint again. We ran out of energy towards the end of the project and decided to slap lining paper on top of old wallpaper in certain rooms to save time (including, unfortunately, the master bedroom) and it just doesn’t look as good – you can see where the lining paper joins up and it has already started to bubble.

5. Decorative mouldings on wardrobe doors are easy enough to prise off but they leave marks which are almost impossible to get rid of. We would have just bought new wardrobe doors for the master bedroom at the outset if we’d known that repeatedly sanding, filling and painting them would only achieve a not-quite-perfect result.
6. Tile paint applied over the top of tiles with a textured or embossed surface looks a bit shit, quite frankly. I did one bit of border and decided I’d had enough and that the pink tiled walls would have to stay.
7. A dated bathroom still looks dated even with a few choice embellishments. While the ensuite does look a bit fresher with the wallpapered panel painted over and a new vinyl floor and shower curtain, it’s still the same pink bathroom with rust spots in the bathtub covered up with Tippex.

8. It’s important to look at a large enough swatch when choosing a carpet. I thought I’d picked out a cool toned light grey one for upstairs but once it’d been fitted, it looked decidedly more oatmeal (the brown tones and flecks weren’t as obvious when looking at a small sample).
9. Getting a blinds specialist to fit measure up and vertical blinds is worth the additional expense. I’ve attempted to buy off-the-shelf blinds and cut them to size in the past and it’s always resulted in a bit of a mess so it was a real luxury to have them measured up and then installed in the space of a few hours.

10. A replica George Nelson bubble lamp from a Shenzhen-based eBay seller costing a fraction of the price of the real thing was always going to look akin to a flammable nylon swimming costume stretched over a clothes hanger. I learned my lesson, swallowed the expensive import duties, shipped it back and bought an ex-display model from SCP.

George Nelson apple shaped bubble lamp from SCP

11. The actual cost of a project is about 20% more than the anticipated cost.

Modernist pilgrimage to Brussels
I had a day and a bit of free time in Brussels tacked on the end of a business trip so I decided to use it doing three of my usual pastimes: rummaging through tat at a flea market, taking photos around a brutalist building and looking at (but not buying any) mid century modern furniture.
Place du Jeu de Balle flea market
Established in 1854 and reportedly the only antique and flea market in the world open every day of year, the Place du Jeu de Balle flea market was fully of pretty good tat compared to flea markets I’ve visited in Berlin, Copenhagen, Helsinki, New York and San Francisco.
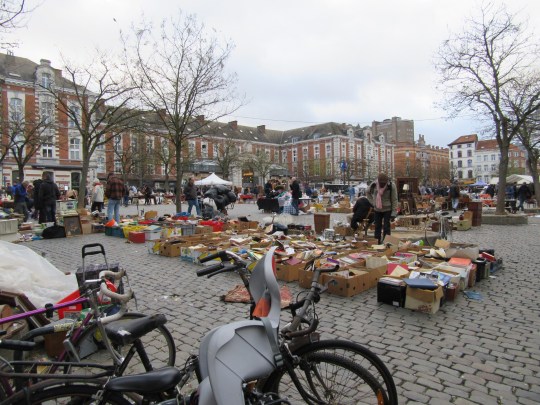

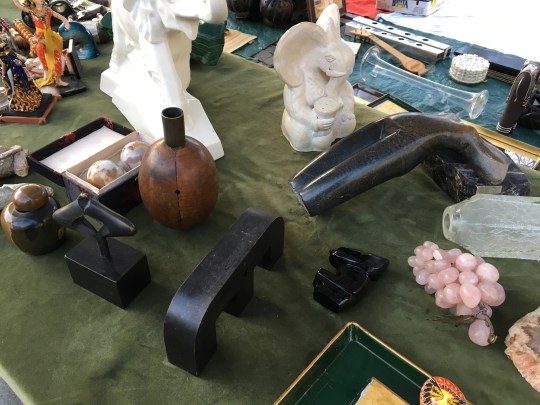
The market was made up of stall after stall of miscellaneous objects, sometimes strewn out on blankets and sheets or crammed into cardboard boxes, ranging from antique to 20th century porcelain, pictures, pottery, fabric, clothes and furniture. Even though the market was limited to professional dealers, it had an informal yet organised junkyard feel to it, which I liked.


Prices were about average for a European flea market but in retrospect, I was massively ripped off with my first purchase – a bust, which I liked the look of but was clearly complete junk and totally not worth what I paid for it (I found remnants of a “Made In” sticker when I got it home). I went on both Friday and Saturday – apparently dealers tend to replenish their stock on Thursdays and Fridays but Saturday had a livelier feel with more stalls.

Westrand Cultural Centre
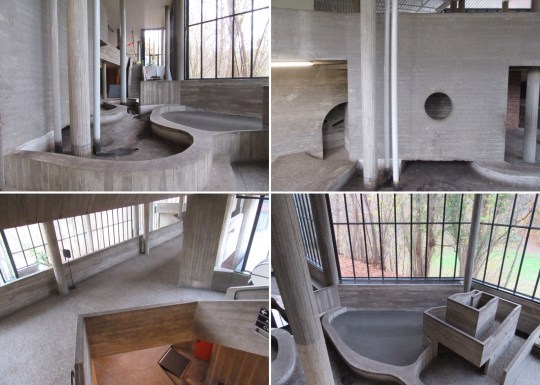
Although the exterior of the Westrand cultural centre was interesting enough (concrete punctuated with panels of bright colour), the interior really was something else.


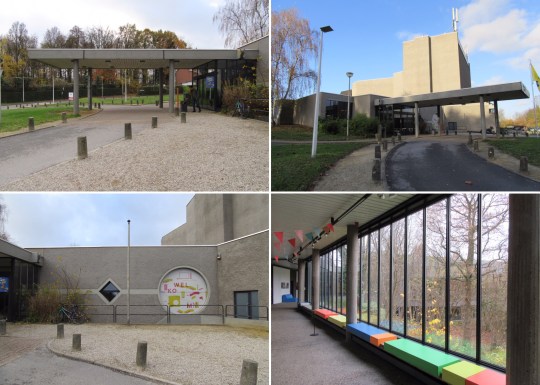
Sort of like the Hayward Gallery in London but on smaller scale and a lot weirder, it was filled with concrete indoor landscaping which appeared to serve no actual purpose other than to provoke and confuse. A section on the lower floor was particularly installation-like, resembling a drained water feature crossed with a child’s adventure playground.

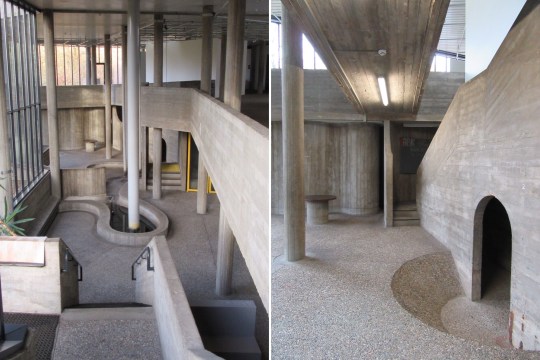
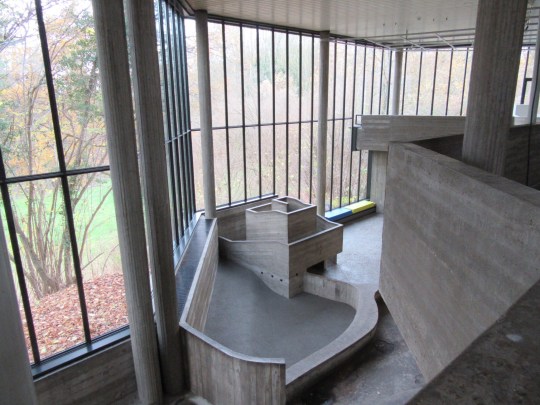
The sense of strangeness was heightened by unexpected inclines, circular openings in the concrete (which didn’t really lead anywhere) and the fact that the whole building was almost completely deserted – there wasn’t exactly a buzzing programme of cultural events on that day.

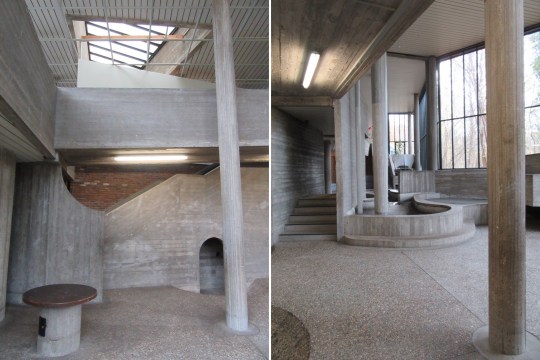
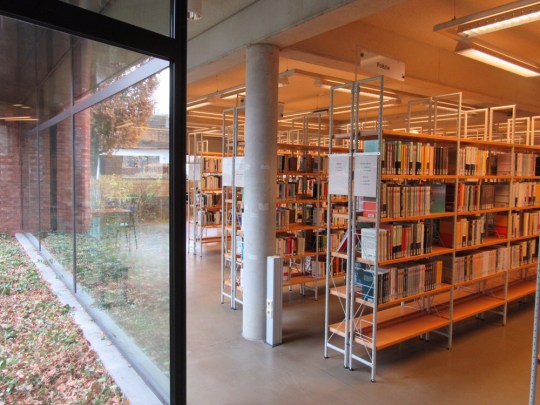
I did eventually find signs of life in the building – the easterly end housed a pleasingly designed public library and the westerly part contained a pleasant enough informal bar and restaurant.

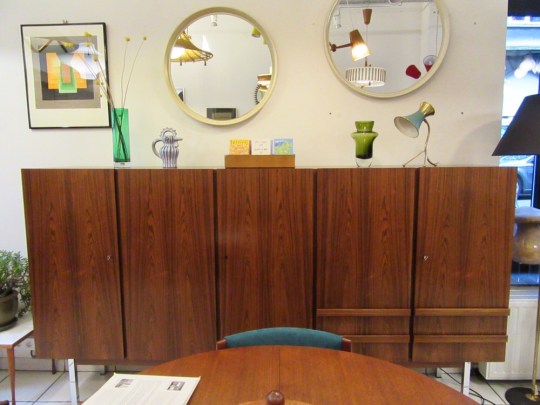
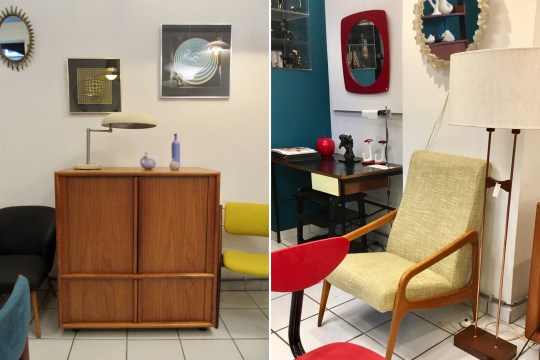
Dandelion, Rue de la Victoire 184
There seemed to be a real appetite for high end mid century modern furniture in Brussels with antique stores on practically every shopping street selling the stuff, usually piled high and at prohibitive prices.


Dandelion stood out from all of the other antique stores due to the quality and condition of its pieces (each piece had been expertly restored by the owner before being put up for sale), the uncluttered presentation of the pieces on the shop floor (small but unpretentious) and the reasonableness of the pricing (substantial items of furniture such as desks, sideboards and armchairs were priced between €250-350).
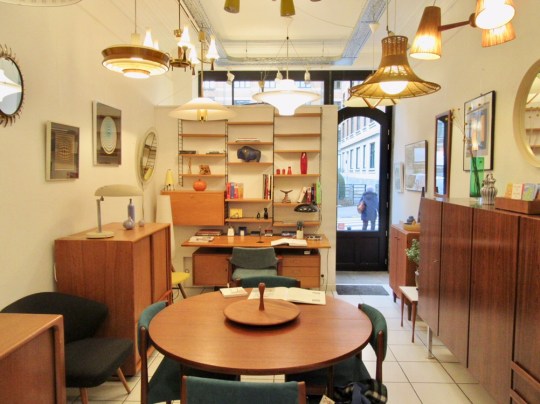


The depth of the owner’s passion for mid century modern furniture and design really came across in the selection of pieces for sale and his knowledge about each piece – whilst there were some classic items that I recognised, others were more obscure, made by European designers that I hadn’t come across.

I was particularly taken by a compact black and teak 1960s Pierre Guarriche desk, beautifully restored and priced at a rather unbelievable €250 (a similar one is priced at in Panamo at €900). I would definitely have bought it for my new study were it not for the fact that the shop didn’t do or arrange for deliveries overseas.
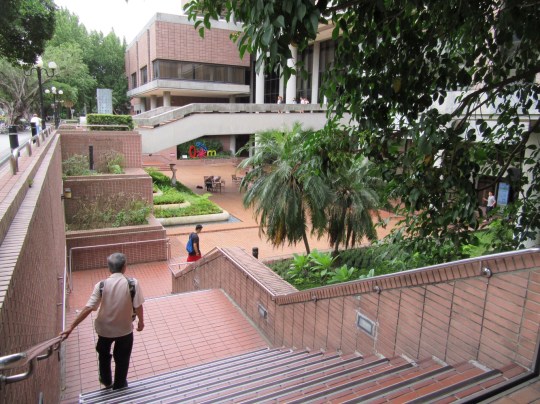
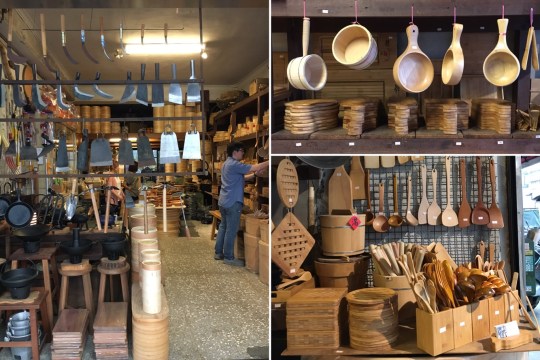
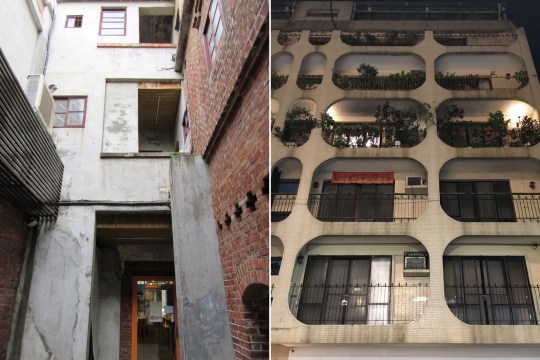
Modernist pilgrimage to Taipei
Taipei had some great brutalist architecture and was clearly quite a design-centric city with some great independent stores selling beautiful objects at decent prices in the Datong district (the areas around Dihua Street and Zhongshan metro station in particular). I wish we’d had longer than a day and a half to explore.